
DIY pet bed

DIY pet bed

Do you have a fur baby that sometimes has to sleep in a kennel, during times when you're away from home? This is a simple, no-sew DIY kennel bed project that anyone can accomplish. 

I timed myself when making my pooch this DIY kennel bed. It actually took me about forty-two minutes from start to finish.


My almost eight-year-old boxer has to be placed in her dog's kennel during thunderstorms, or else she simply goes loco. We purchased two different kennel mats for her, but for some unknown reason, she doesn't like either of them. Instead of her using them to lay on, she wads them up, and literally kicks them to the corner of her kennel.


Since Princess (my dog) isn't getting any younger, she really doesn't need to be lying on the hard floor of the kennel. So, I came up with this DIY kennel bed idea for her.


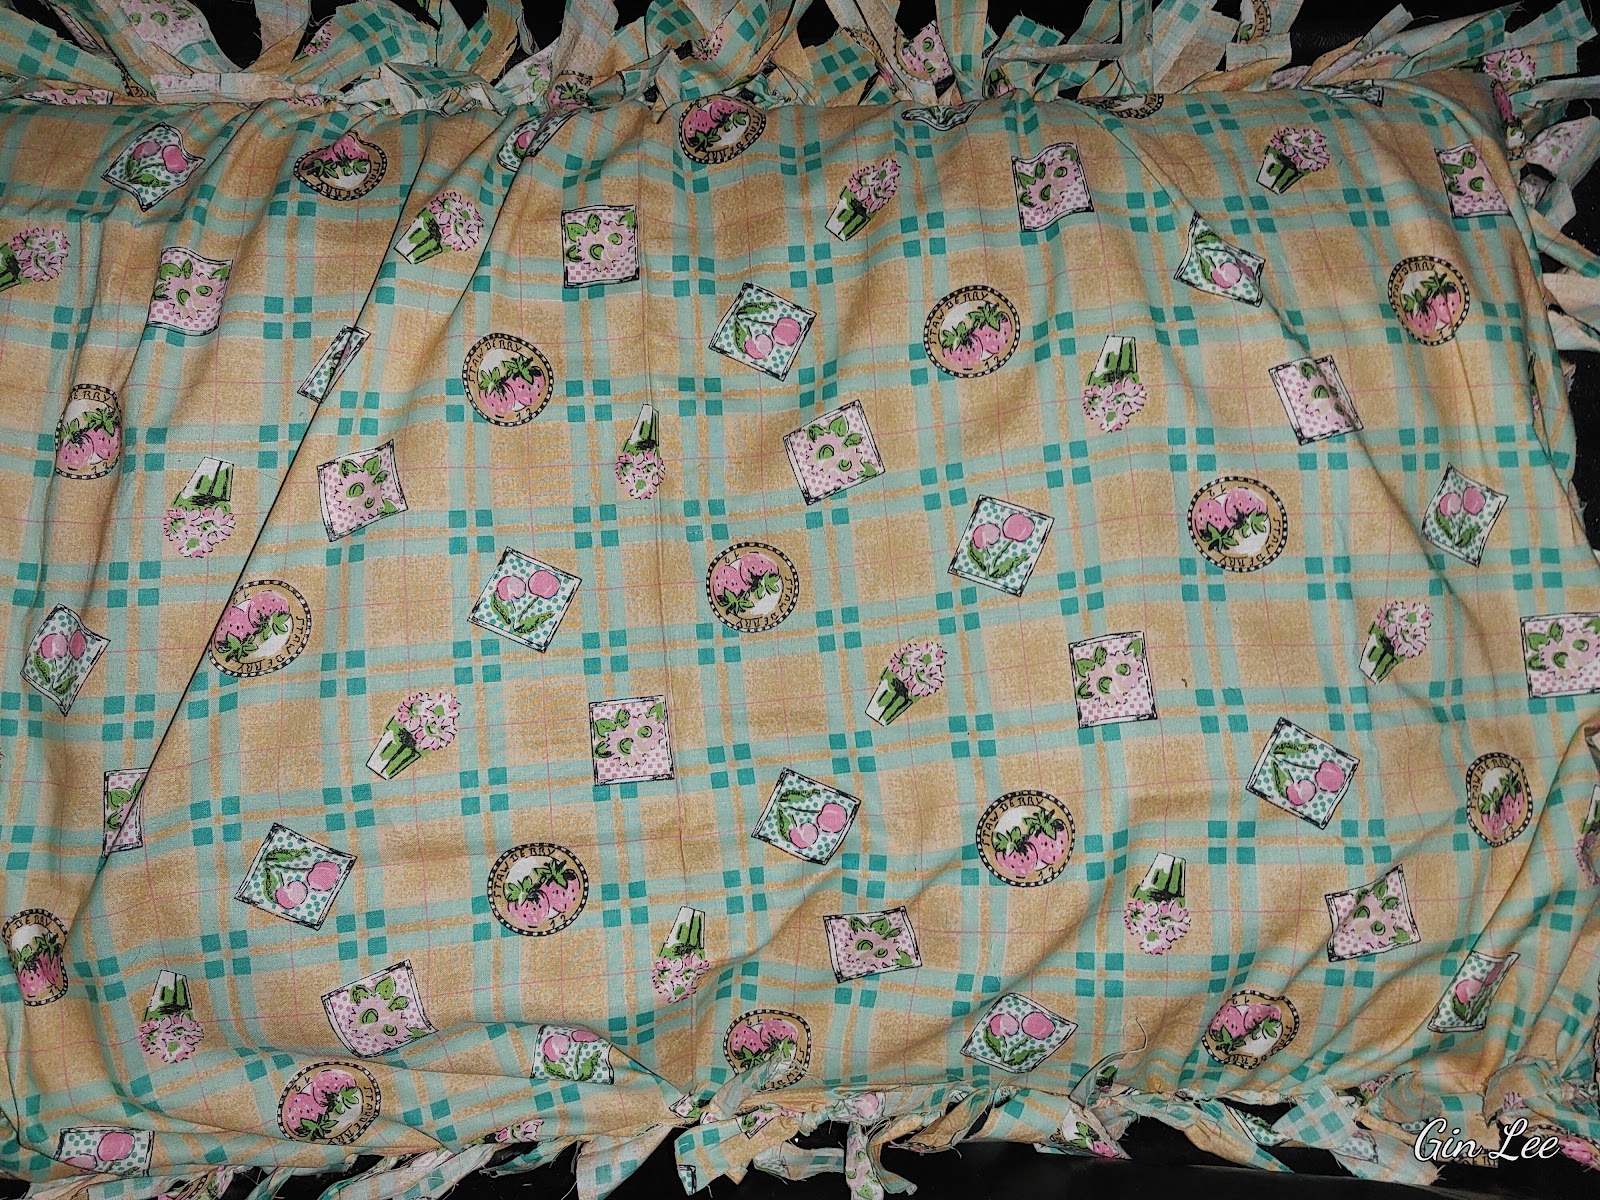
The length and width of my dog's kennel is 54 inches x 37 inches. So, I cut out two pieces of soft material that size, then I cut strips along the edges of both pieces of material one-inch to two inches wide and about four-inches long. (I didn't do any precise measurements on the ties. I just eyeballed what I thought looked about right.)


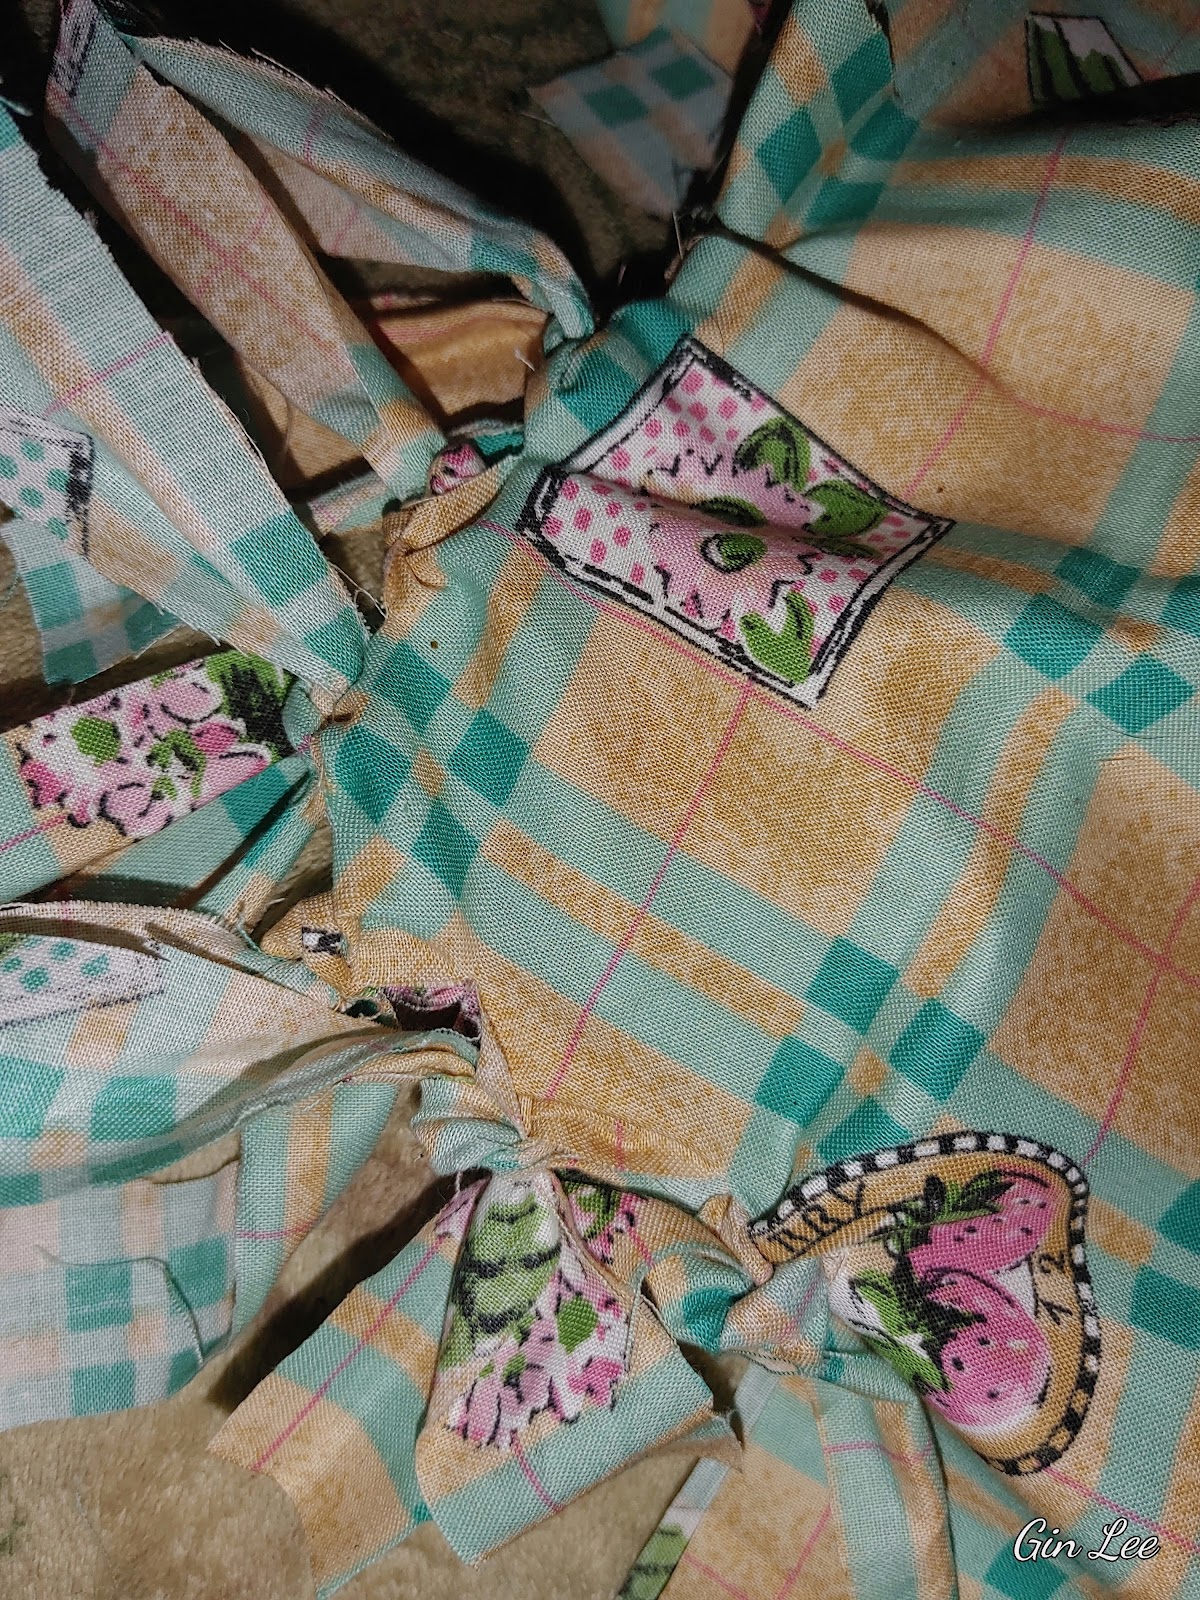
After that, I made sure that the printed sides of each piece of material were facing outwards (wrong sides together). Then I began tying the strips and knotting them together. 


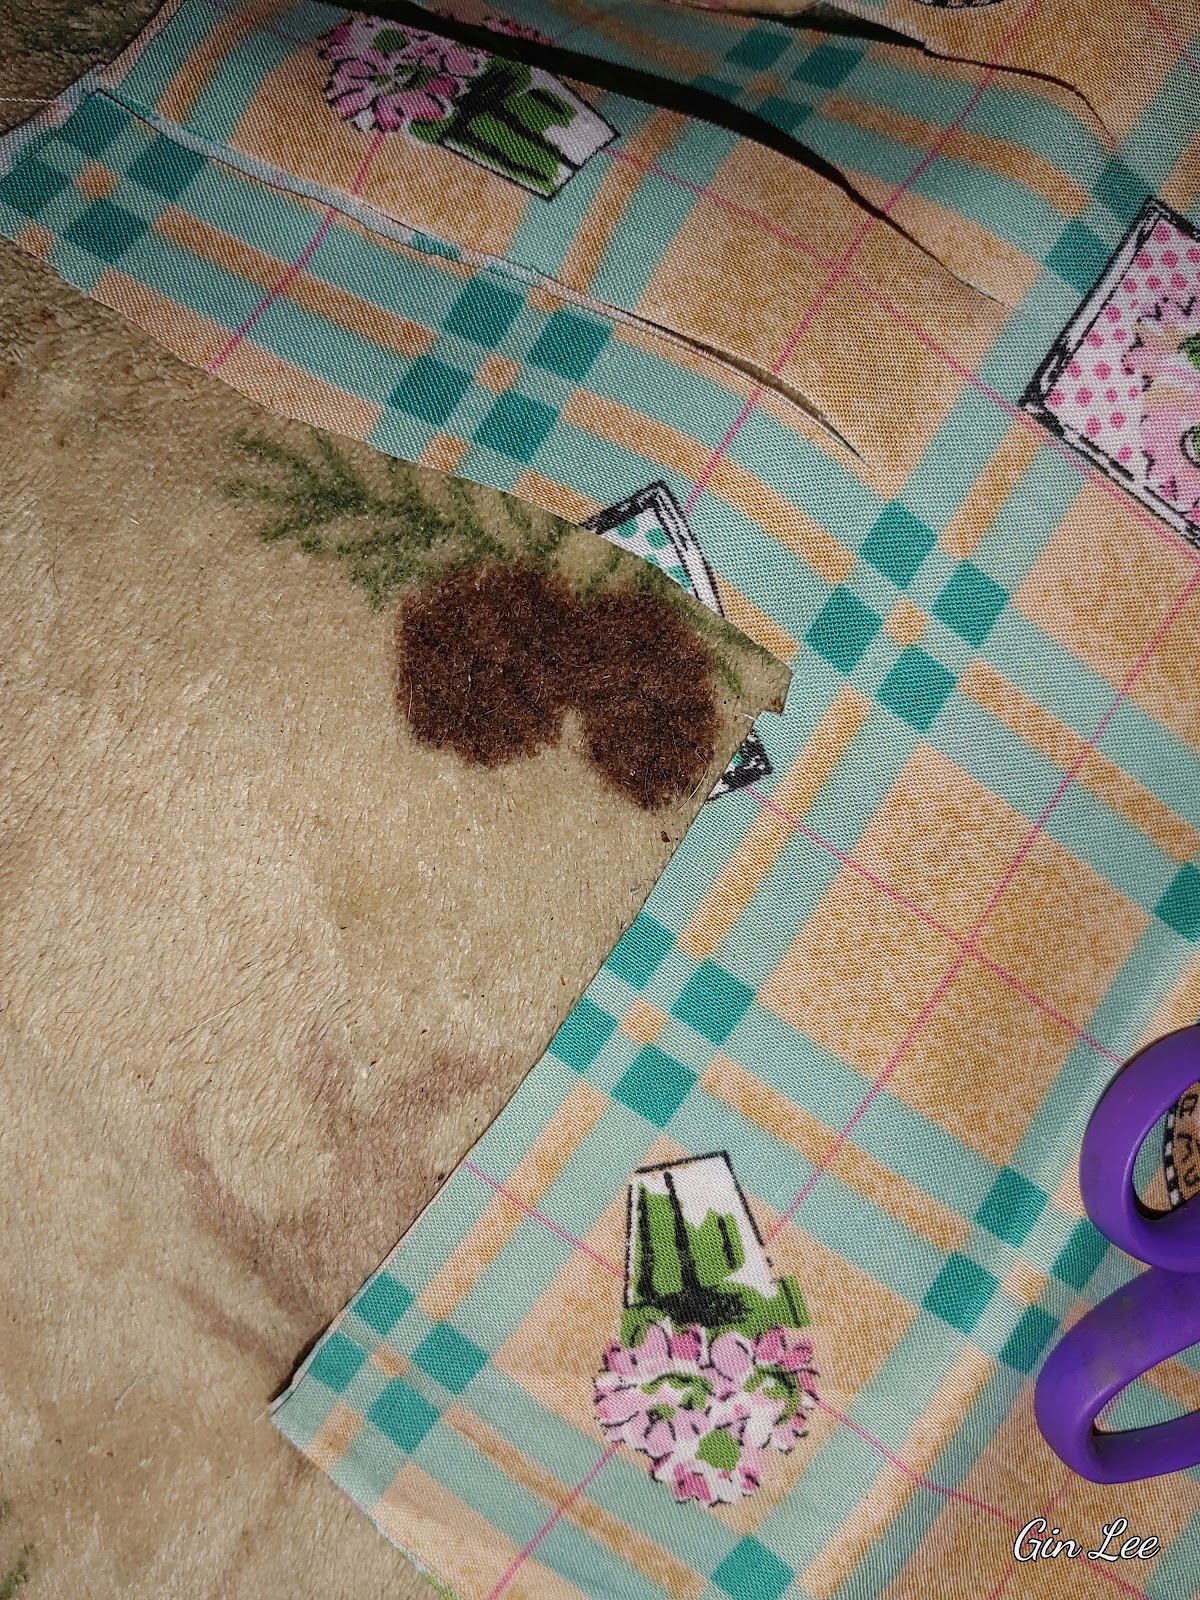
When you make your way to the end corners, you'll need to cut a square piece out of each corner. If not, the ties won't want to line up right when they're tied. 


I finished tying all the string pieces until I had all the sides tied together, except for one of the end (width) sides. I left one end untied, so that I could place a large pillow inside the mat cover. Then once I did that, I finished tying the strips of material together on that last part. The outside edges looks like fringe once the pet bed has been completed.


This DIY made an adorable dog bed that hardly cost anything, except for the forty-two minutes that it took me to make it. (I used materials that I already had.)

Note:

You could use an old fleece blanket, sheet, cloth table cover, etc. for the material, and use an old pillow or an old cushion to place inside the center for stuffing. Cut the material to the size of your fur-babies kennel, then follow the directions. By the time you have each side tied together, it will fit down inside your pet's kennel perfectly.


You could totally do this DIY without adding any type of stuffing inside of it. I think it would be really comfy if you used a thicker fleece type of material. 


Of course, the pet bed can also be stitched together by hand, or with a sewing machine, but then it wouldn't be as cute, in my opinion.


Popular posts from this blog

How to Grow Lentils in Hydroponic Trays

How to Grow Lentils in Hydroponic Trays Introduction Lentils are a nutritious and delicious legume that can easily be grown in hydroponic trays. Hydroponic gardening is a method of growing plants without soil, using nutrient-rich water instead. In this article, we will discuss the steps on how to grow lentils in hydroponic trays with nutrient solution and without it using only water. Materials Needed To grow lentils in hydroponic trays, you will need the following materials: Hydroponic trays Hydroponic trays that will hold the lentils and nutrient solution. Lentil seeds Make sure to use high-quality lentil seeds for the best results. Nutrient solution A mix of water and nutrient solution that will feed the lentil plants. Grow lights Since lentils need plenty of light to grow, you will need grow lights if you don't have access to natural sunlight. Steps to Grow Lentils Step 1: Prepare the Hydroponic Tray Fill the hydroponic tray with the nutrient solution according to the instru...

Introduction to Holiday Flock Blocks Made With Applesauce

Holiday Flock Blocks Made With Applesauce Welcome to my guide on creating delicious and nutritious Holiday Flock Blocks made with applesauce! Designed to provide your flock with a festive and healthy treat, these homemade blocks are packed with the goodness of applesauce and can be customized with various flavors and ingredients. In this article, we will explore the benefits of using applesauce in flock blocks, provide a step-by-step guide on how to make them, suggest creative variations and flavor combinations, offer tips on storing and presenting the blocks, discuss the health benefits for your flock, address common questions and troubleshooting, and conclude with our final thoughts. Let's dive in and create some delightful treats for your feathered friends this holiday season! Introduction to Holiday Flock Blocks Made With Applesauce What are Holiday Flock Blocks? Holiday flock blocks are a fun and nutritious treat for your feathered friends during the festive season. These hand...

Rendering Lard: A Sizzle of Tradition and Flavor

Rendering Lard: A Sizzle of Tradition and Flavor In light of rising prices, allow me to demonstrate how you can save money on cooking oil by creating your own lard at home. Rendering lard, the process of melting down and purifying pork fat to create a versatile cooking ingredient, has a rich history deeply rooted in culinary traditions around the world. While lard fell out of favor for a period, it is experiencing a resurgence due to its unique flavor profile and various benefits in cooking. My article today explores the art of rendering lard, from understanding its origins to selecting the right fats, different rendering methods, storage techniques, culinary uses, and essential tips for achieving optimal results. Historical Significance of Lard Lard holds a prestigious place in culinary history, being a key ingredient in traditional recipes across various cultures. It was prized for its versatility and ability to enhance the taste of dishes. Benefits of Rendering Lard Contrary to popu...