Making homemade paper by recycling used paper products on the homestead
If you're like me, you probably get a ton of junk mail. Don't throw it away! Instead, save it to upcycle into new pieces of craft paper, DIY toilet paper, wall art, and homemade wall tiles.
Things you'll need to make paper pulp:
Used paper (If you're making the recipe for DIY toilet paper, don't use any type of glossy paper, and DO NOT reuse bathroom toilet paper that's already been used. Sorry, but I had to add that in as a disclaimer.)
Leafs, flower petals, grass clippings
Water
2 old clean towels
Instructions for making DIY paper sheets from pulp:
First, gather up as much used paper and as many leaves as you want.
Shred the paper with a paper shredder or rip it into smaller pieces. Soak the paper into a large metal pan of hot water for about one hour.
Now, place the pan on the stovetop, add leaves, flower petals, and grass clippings. Then simmer for an hour. Then remove the pan from the stove and allow the pulp mixture to cool.
Next, lay an old clean towel out on a flat work surface. Take spoonfuls or handfuls of the pulp mixture and spoon it out as flat and thin on the towel as possible. Use a rolling pin to get the pulp even thinner. Once that's done, use another clean old towel to cover the pulp.
Now, by adding pressure, use the rolling pin and roll it in a back-and-forth motion over the towel. This will get any excess water out of the pulp so that your homemade paper can dry quicker. Take the top towel off, and allow the paper to dry for about one day.
Once your paper has dried completely, use scissors to trim it and cut it into the size that you prefer.
For making homemade toilet paper, do not use any type of glossy paper. Add one to two teaspoons of essential lavender oil, rosehip oil, or aloe vera oil to the pulp. When rolling the pulp out on the clean towel surface, try getting it as thin as you can.
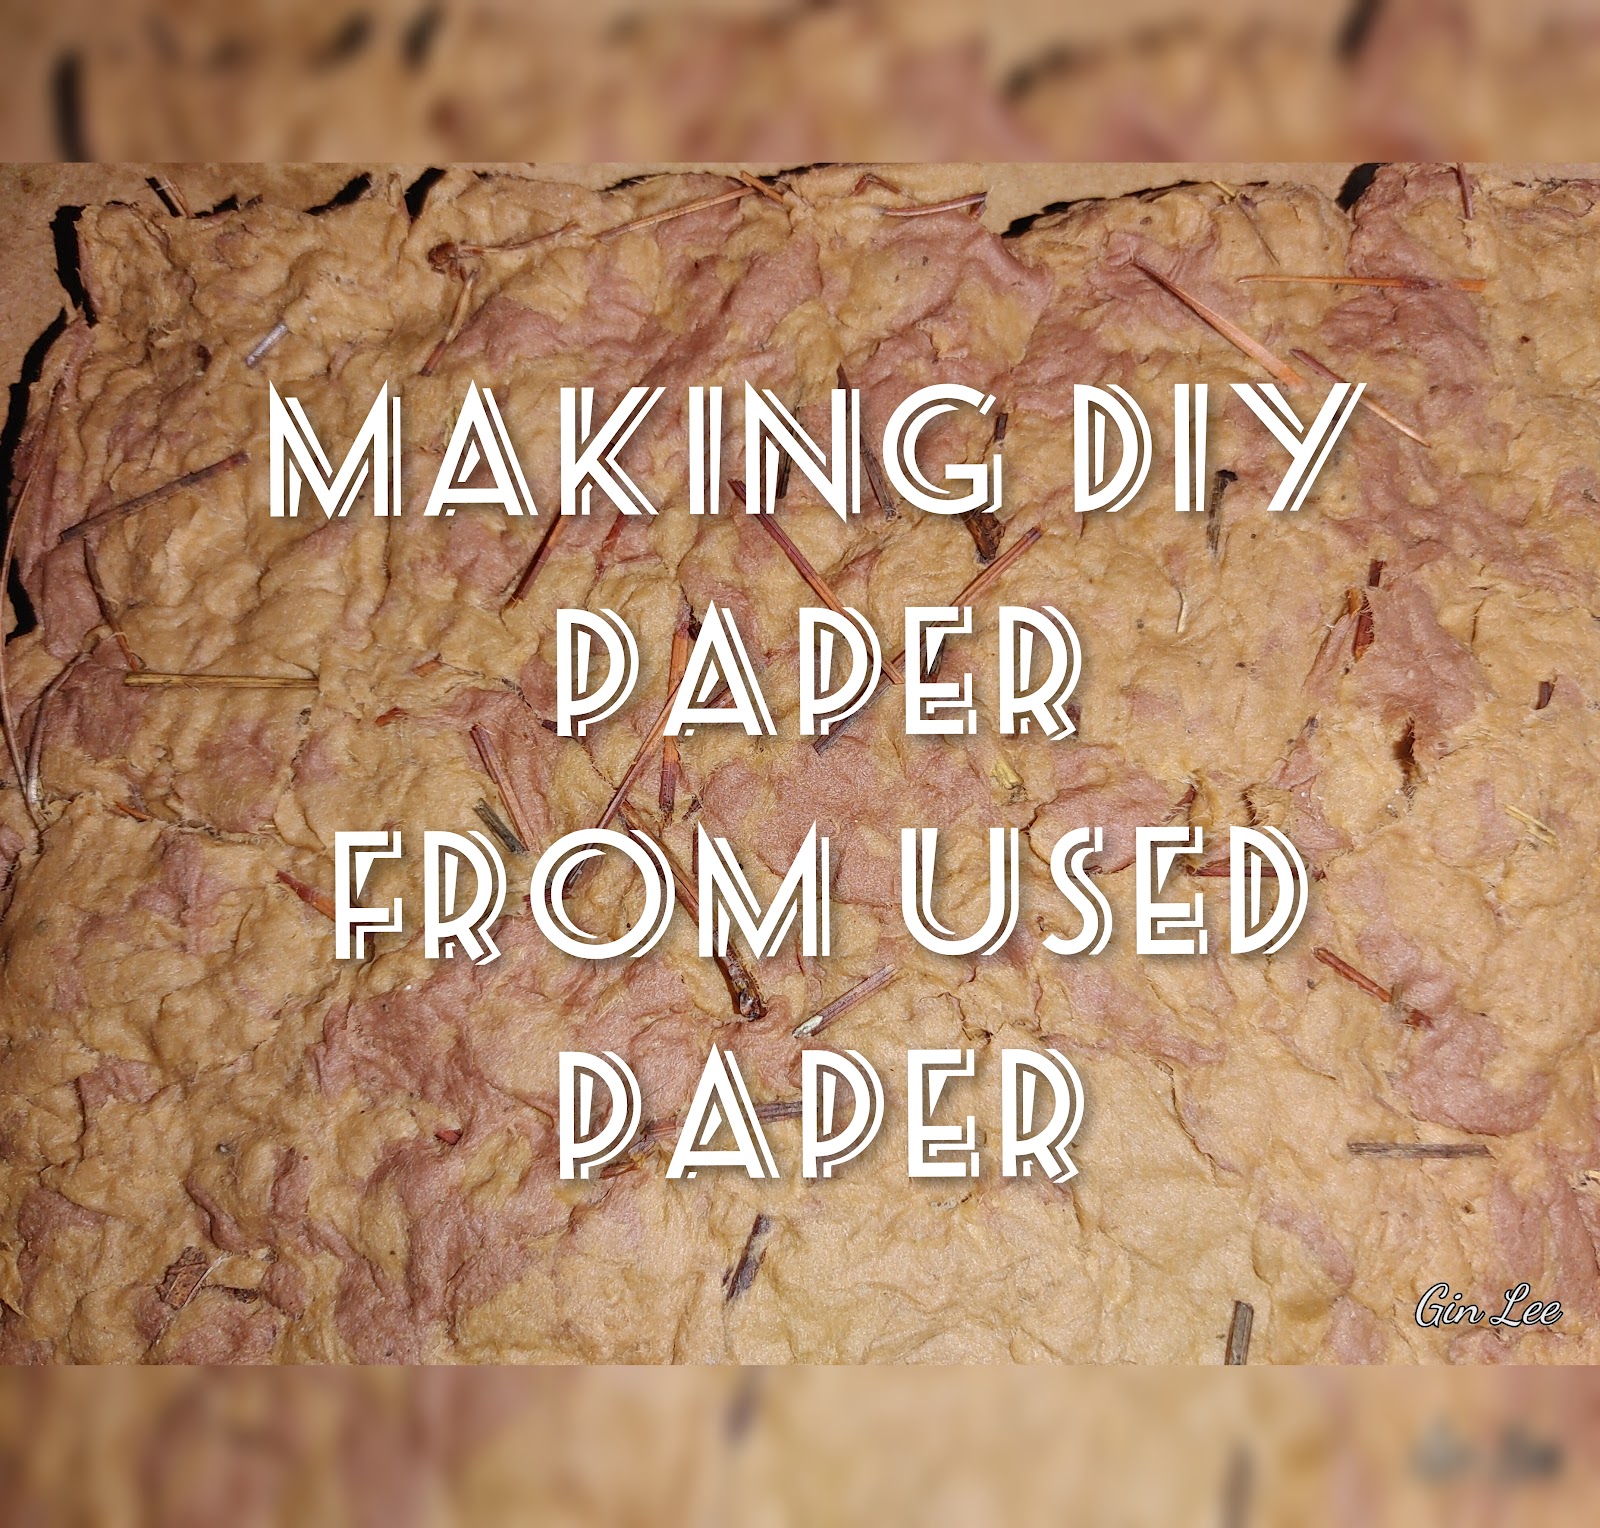
Adding the leaves, flower petals, and or grass clippings to the pulp adds stability to the paper and works as a binder.
Today was the first time that I made paper using pine needles and brown packaging paper. I wouldn't suggest using the two of these items when making DIY toilet paper.
For DIY wall tiles
You'll need the following:
Used paper (any paper will work for making the DIY tiles)
Leafs, flower petals, grass clippings
Water
Paint for painting the tiles after the paper dries (Optional)
1-8x10 picture frame with screen stapled onto the backside (just the frame part) mesh materials can also be used
1-8.5×11 picture frame with screen or mesh material stapled onto the backside of the frame
(The frames you use can be any size, but these are the sizes that I had on hand.)
You'll also need wallpaper glue to adhere the tiles to the surface's that you plan to apply them on once the tiles are completely dry and painted.
The picture frames can be any size that you prefer. I use a 8x10 and a 8.5×11. The 8.5×11 will be used to shape the paper pulp into, while the 8x10 will be used simply as a paper press.
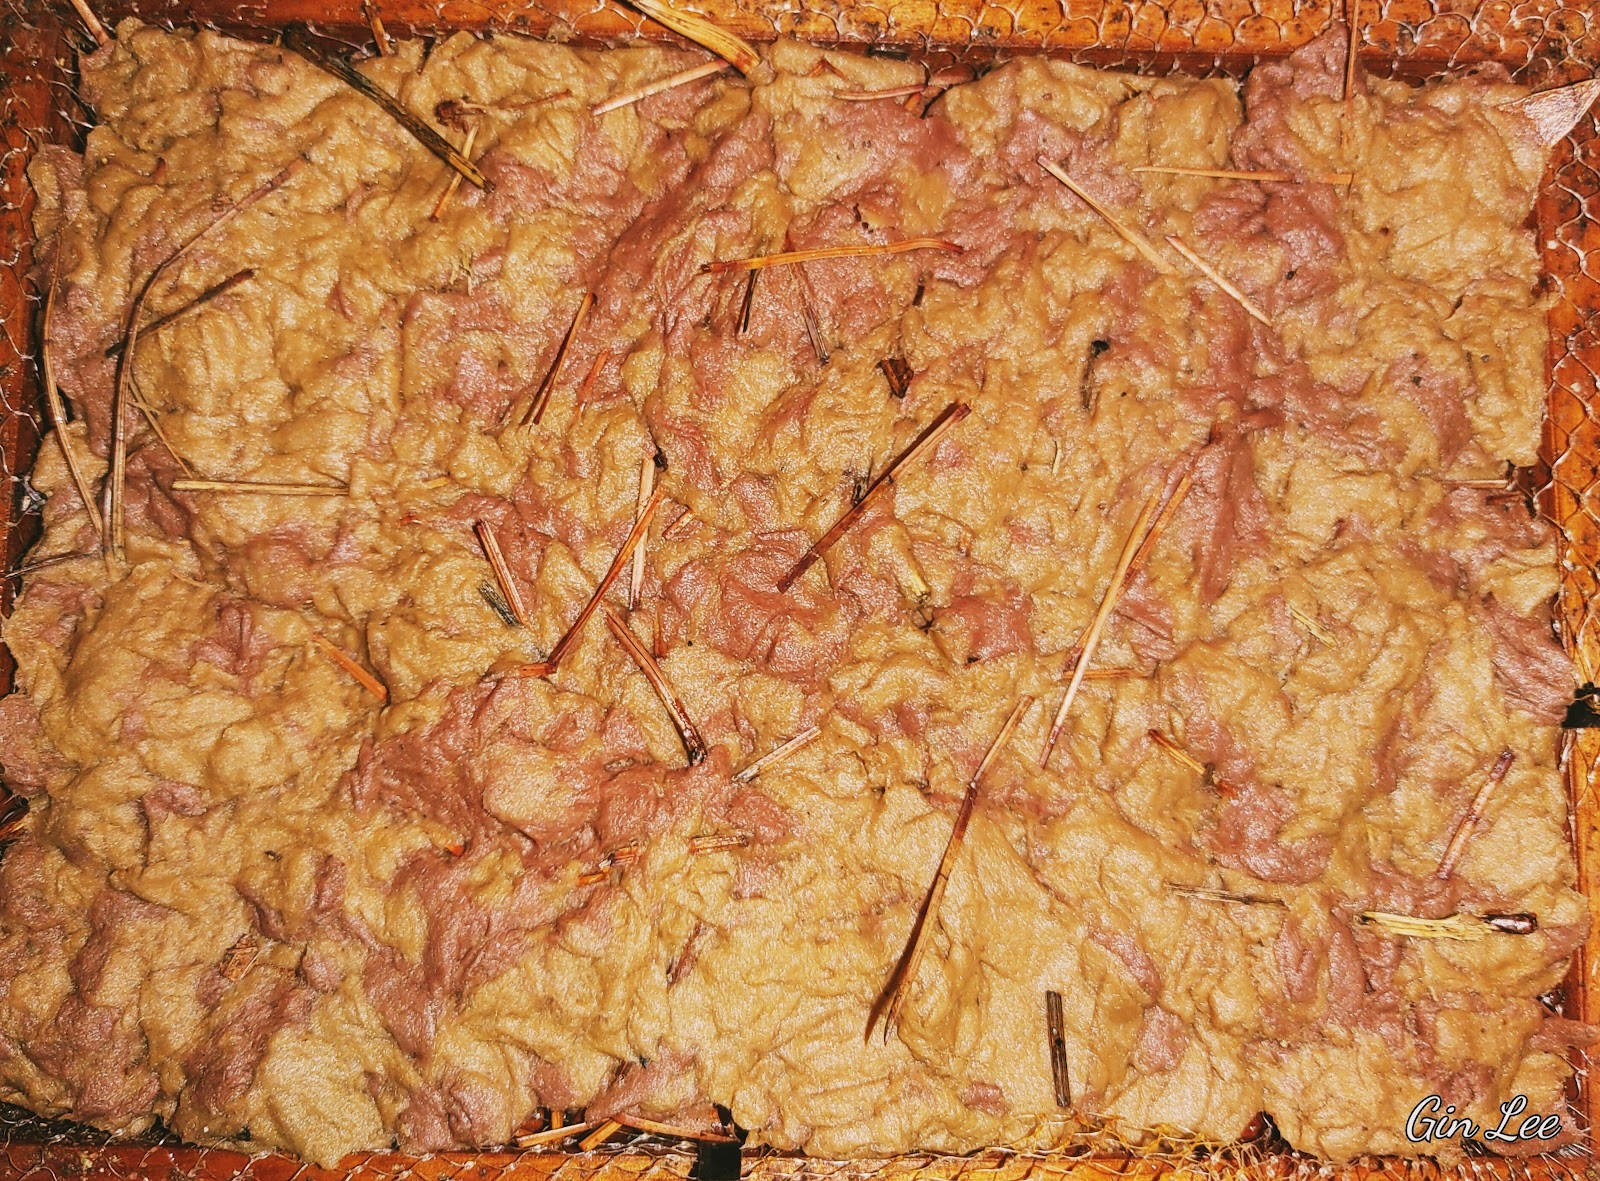
The 8.5×11 frame will be used to put the paper pulp into. Both the frames and screening will allow the pulp to be shaped with near perfect edges. You'll want the edges to be straight and neat for wall tiles.
Follow the directions to make the pulp, then place enough pulp inside the center of the 8.5×11 picture frame, and spread it out evenly. Once the pulp is in the frame, make sure that all the pulp is smoothed out towards all the edges, then place the other frame inside the biggest frame and press the excess water out of the pulp. The pulp will need to come up to the height of the edges of the 8.5×11 picture frame.
Note:
If you'd rather buy the pulp frame, Wal-Mart sells them. But I prefer using items that I already have on hand.
Allow the tile to dry, then repeat the steps for making as many tiles as you'll need for your project. Paint and allow to dry. You can also wait to paint the tiles until after they're applied to the surface with wallpaper glue.
The pulp used for this project will need to be thicker than it would be for regular DIY paper. The DIY tiles will take longer to dry since they are thicker.
Making more screened frames is useful for this project and the frames can be stacked in a criss-cross manner to save space while the tiles dry.
Notes:
Making DIY paper can be a bit messy, but it's a fun family project, and it's a way to reuse household paper waste, as well as unwanted grass clippings.
Be creative and press wild flowers into your DIY paper before drying the pulp for a beautiful display of uniqueness.
The pulp frames aren't entirely necessary to make homemade wall tiles. The wall tiles can be made in any shapes. I prefer using them because when the paper dries, it's left with the 3D screen indentions.
Paper pulp can also be made without grass clippings, flower petals, and leaves when making pulp for DIY paper. The paper can be made into any shapes such as hexagons, squares, hearts, circles, etc.