Guide to Creating Chicken Diapers
Have you ever wondered why someone would need to know how to make chicken diapers? Well, in the unfortunate event that one of your chickens falls ill or gets injured and needs to be brought indoors, chicken diapers can be a lifesaver in managing the mess. They can also be beneficial if you have a special needs chicken that requires indoor care. These instructions can also be adapted for creating diapers for ducks or any other bird with special needs. Simply measure your bird and determine the appropriate size needed. I trust that this guide will be both informative and practical.
The chicken diaper pattern provided here is for a one-piece slip-on design. If you prefer a diaper that is easier to put on your bird, you can modify the back piece by cutting it in half and attaching velcro for a quick fastening solution.
Please note that this diaper pattern was specifically designed for a gentle and docile Black Australope hen.
In developing this pattern, my goal was to create a durable double-sided diaper. Each piece of fabric was cut in duplicate and sewn together to ensure longevity. All edges are seamed to prevent fraying, and the design accounts for frequent washing. I hand-sewed this particular diaper, but it can be stitched up even faster on a sewing machine.
Measurements:
Base of tail to base of neck:
Back piece: 5 inches in length, 2 inches wide
Upper chest to vent: 10 inches in length, 2 inches wide
Width of tail: 3 inches
Width of neck: 3 inches
The chest piece and back piece should each have a width of 2 inches, but cut them slightly larger to accommodate seam allowance. Adjust the size accordingly if you have a bantam or young chicken. Cut each piece of fabric in duplicate, ensuring that the design sides are facing each other when sewing. Leave an inch unsewn to allow for turning the pieces inside out, then stitch the openings closed.
To create the poop pouch, cut two 3 to 5 inch square pieces of fabric, sew them together with right sides facing, and then flip them right side out.
When cutting fabric for your bird diaper, be sure to include a seam allowance for each piece to ensure they can be sewn together properly.
To create a bird diaper, you will need the following materials:
2 pieces of stretchy elastic ribbon, each about 4 to 6 inches long (length depends on the size of the bird you are making the diaper for).
1 chest piece (2 pieces of fabric cut the same size, approximately 10 inches long, allowing for seam allowance and measuring your bird's size).
1 back piece (2 pieces of fabric cut the same size, about 5 inches long, allowing for seam allowance and measuring your bird's size).
1 poop pouch (approximately 5 inches x 5 inches for a larger bird).
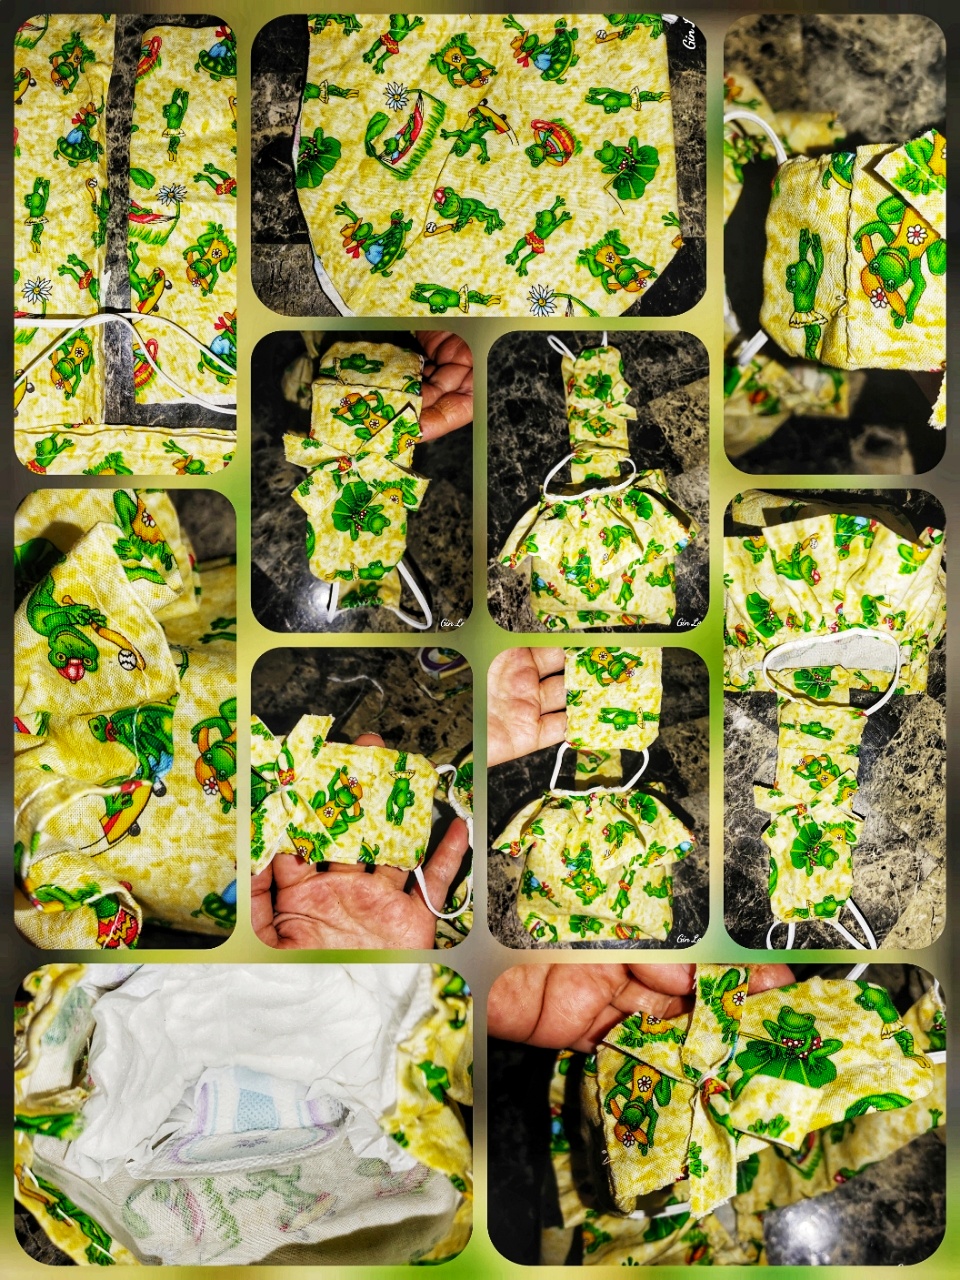
2 thin feminine pads to criss-cross inside the poop pouch. Consider using a waterproof material as the inside liner for easier maintenance.
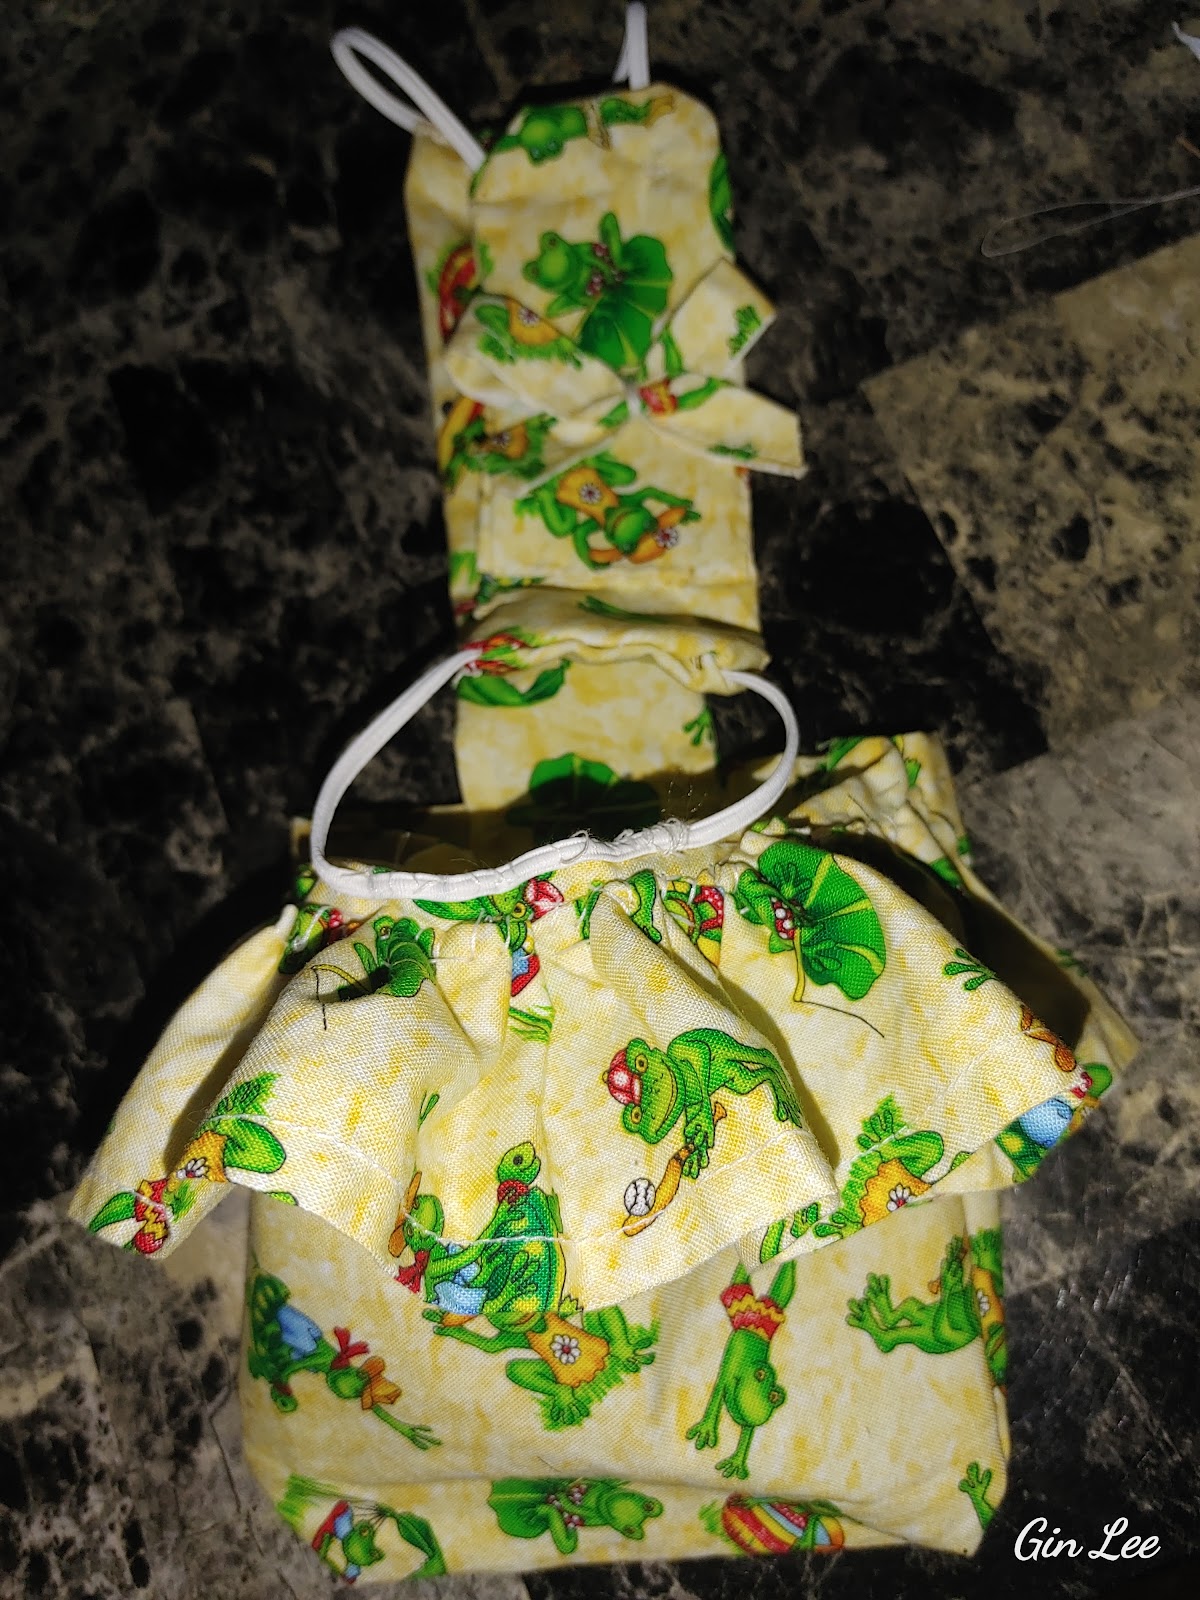
1 15-inch long x 2-inch wide piece of material or wide ribbon to create a ruffle on the poop pouch. Hem the sides of the ruffle, stitch, and gather the top edge before sewing it onto the backside of the poop pouch. (Optional)
1 fabric or ribbon bow for decoration on the back piece. (Optional)
Instructions:
To assemble the bird diaper, sew the poop pouch onto one end of the chest piece, creating a shape resembling a dipping spoon or shovel.
Attach the elastic pieces to the back piece by slip-stitching them onto the fabric's edges.
Sew the back piece onto the chest piece by sewing the elastics onto the two front corners.
Line the pouch with thin feminine pads in a criss-cross pattern or sew a waterproof liner inside for easier cleaning.
To properly secure the garment on a chicken, begin by placing the chicken's head through the middle of the front piece of elastic. Then, bring the back piece over the head and secure it around the tail, ensuring the poop pouch is positioned through the legs and covering the cloaca.
It is normal for the chicken to fuss with the garment initially, but it is important to ensure there is enough room around the neck for comfort. You should be able to easily slip two fingers underneath to check for proper tightness. If the garment is too loose, adjust it accordingly for a snug fit.