Monday, December 23, 2024

Homemade Microwave Fudge: Without Marshmallow Fluff or Sweetened Condensed Milk


Homemade Microwave Fudge: Without Marshmallow Fluff or Sweetened Condensed Milk

“It's beginning to look a lot like Christmas!” And if you are searching for a simple, delicious dessert for the holiday, today I am making an easy microwave fudge that doesn't require sweetened condensed milk or marshmallows. My recipe can be made sugar-free or with regular powdered sugar. I hope that y'all will enjoy it either way! Merry Christmas and Happy New Year, everyone!

Ingredients:

  • 1/2 cup of unsweetened cocoa powder

  • 1 cup of sugar-free powdered sugar or regular powdered sugar

  • 1/4 cup of evaporated milk, coconut milk, almond milk, or regular cow's milk

  • 1/4 cup of butter

Optional Ingredients:

  • 1/2 cup of chopped nuts, or more depending on your preference. You can also use whole nuts and press them on top of the fudge just before placing it into the refrigerator to firm up.

Instructions:

To make easy microwave fudge without sweetened condensed milk or marshmallows, combine 1/2 cup of unsweetened cocoa powder, 1 cup of sugar-free powdered sugar or regular powdered sugar, 1/4 cup of your preferred milk, and 1/4 cup of butter in a microwave-safe bowl.

Microwave for about 3 to 5 minutes, stir until smooth, and add chopped nuts, if you desire. Then stir again. 


Pour the hot fudge mixture into a greased 9.2-ounce rectangular pan and add more nuts on top, if desired. Refrigerate until firm. I generally allow mine to sit overnight.

Once your fudge has firmed up, use a sharp knife and cut it into square-shaped pieces.

Please note that I used Hershey's cocoa powder for my fudge, but feel free to use any brand of your preference. I also utilized Pet brand evaporated milk and pecans for the nuts, but feel free to substitute with whatever ingredients you have on hand.

When preparing this recipe in the microwave, I recommend stirring the mixture in 30-second intervals to ensure even cooking. The cooking time will vary depending on the wattage of your microwave.

Personally, I doubled the recipe by preparing one bowl at a time. Afterward, I poured the hot fudge mixture from the first bowl into a well-buttered glass Pyrex pan. I then proceeded to make a second bowl of fudge and poured it on top of the first layer. 

Finally, I topped the fudge with whole pecans for added texture and flavor.


The Incredible Benefits of Marigolds: Exploring the Health Benefits of Consuming Marigolds

The Incredible Benefits of Marigolds: Exploring the Health Benefits of Consuming Marigolds


Marigolds are not only beautiful flowers that brighten up any garden, but they also offer a plethora of health benefits when consumed. From boosting immunity to improving digestion, marigolds have been used for centuries for their medicinal properties. In this article, we will delve into the amazing benefits of incorporating marigolds into your diet.

Marigolds are like little powerhouses of vitamins and minerals that are super important for keeping our bodies healthy. These colorful flowers are full of vitamin A, vitamin C, and vitamin E. Vitamin A helps us see well, boosts our immune system, and keeps our skin looking great. Vitamin C is a strong antioxidant that fights off bad stuff in our bodies and helps our immune system stay strong. Vitamin E is another antioxidant that helps keep our skin healthy and supports our immune system.


Marigolds also have minerals like potassium, which helps keep our electrolytes balanced, regulates our blood pressure, and keeps our hearts healthy. They also have a little bit of calcium, iron, and magnesium, which are all important for keeping our bones strong, carrying oxygen around our bodies, and helping with different chemical reactions.

Antioxidants in Marigolds

Marigolds are full of antioxidants, which are like little superheroes that protect our bodies from damage caused by free radicals. One important antioxidant in marigolds is lutein. Lutein is a carotenoid that helps keep our eyes healthy by blocking out harmful blue light and protecting our retinas. It also has anti-inflammatory properties and might even help reduce the risk of age-related macular degeneration.

Discovering the Taste of Marigolds

What do marigolds taste like? And what part of the plant is edible?

Have you ever wondered what marigolds taste like? Well, you're in luck because we're about to explore the delicious world of these vibrant flowers! Marigolds have a unique flavor that can be described as slightly citrusy and peppery. Some people even say they have a hint of spice, similar to saffron.


Edible Parts of the Marigold Plant

Now, let's talk about which parts of the marigold plant are edible. The petals are the most commonly consumed part of the plant. They can be used fresh in salads, as a garnish for dishes, or even brewed into tea. The petals can also be dried and used as a spice or food coloring.


It's important to note that not all marigold varieties are edible, so make sure you're using a variety that is safe for consumption. Also, be sure to wash the petals thoroughly before eating them to remove any dirt or pesticides.


Edible marigolds primarily belong to the genus Calendula, specifically Calendula officinalis, commonly known as pot marigold. In addition, hybrids from the genus Tagetes, such as African marigold (Tagetes erecta) and French marigold (Tagetes patula), are also considered edible.


Resources:

Lofgren, K. (2022a) Are marigold flowers edible?, Gardener’s Path. Available at: https://gardenerspath.com/plants/flowers/edible-marigolds/ (Accessed: 12 November 2024).


Tan, S. (2024) Calendula: Health benefits and uses, WebMD. Available at: https://www.webmd.com/vitamins-and-supplements/what-health-benefits-marigold-extract-calendula (Accessed: 12 November 2024).


Viridian Nutrition (2020) The surprising health benefits of marigold, Viridian Nutrition. Available at: https://viridian-nutrition.com/en-us/blogs/nutrition-articles/the-surprising-health-benefits-of-marigold (Accessed: 12 November 2024).


© 2024 Olden Oasis

oldenoasis.blogspot.com


Sunday, December 22, 2024

Pleasures of greenhouse gardening throughout the year

Pleasures of greenhouse gardening throughout the year

Today I thought I would cover a more in-depth article about the simple gardening tips I do during the winter. I already have various garden seeds planted (for winter) and some are already blooming. So, if you're wondering if you can grow vegetables inside in the winter, this is one example to show that you can.

Greenhouse gardening allows gardeners to have a consistent garden environment regardless of what the season is, which means you can keep growing vegetables and fruit even throughout the coldest months of the year without extreme limitations (in most cases). 


There are numerous advantages to having indoor greenhouses. Since I added my greenhouses to the interior of my home, I have actually used less wood and less electricity to heat my home in the winter. The quality of air has become much better. Plus, I don't have to worry about bugs and wildlife eating my vegetable and fruit plants, nor do I have to worry about the weather creating havoc on my garden. 


Most any vegetable plant will grow successfully with a little heat and ingenuity in the winter. During the winter, greenhouse temperatures should be around 65-70 Degrees F during the days and 45 Degrees F during the nights. Different plants do have variable needs, but these temperatures are suitable for most greenhouse plants. During the summer, the greenhouse temperature should stay around 75-85 Degrees F during the day and 60-75 Degrees F during the nighttime hours.

Steps to help keep your plants warm in the winter

Through trial and error, I have found during the coldest weeks of winter it's best to keep your plants up higher off the floor. I do this by using plant stands at ground level. I utilize my space also by using large vertical garden tower planters and hanging planters. 


On really cold nights, you can also use garden cloches, clear tall plastic plant domes, clear plastic tote containers, or clear milk jugs to cover your vegetation. Doing this will hold the heat in around the plants that you can't move to higher levels. This method is actually like having miniature greenhouses. So, even if you don't have a greenhouse or greenroom, these methods work both inside and outside just as well. Cool season vegetables can be grown easily in zones 7 and 8 throughout the winter outside using this method.


If you use plastic domes without vents, plastic totes, or plastic milk jugs, be sure to lift them up (off of your plants) during the daytime so that your plants receive adequate light and get the air ventilation that they need. You can also use boards or bricks to prop up one side of the containers if needed. These methods work with or without having a greenhouse. 

How does a garden cloche work? 

An actual garden cloche has vents that can be opened and closed. While the vents are closed, warm air heats up the soil. When the cloche vents are closed, it keeps the warm air inside, and the inside air will continue to heat up until you open the vents. Plants can live inside vented garden cloches usually just fine and you can use them to garden with or without owning a greenhouse. 

Other ways to keep your plants and greenhouse warmer 

To save money and to make use of large clear plastic bottles, you can cut the bottoms off the bottles and use the top lid to create a simple, cheap, but effective garden cloche. With the lid screwed on, it will hold the heat in at night. Removing the cap creates a vent so that you can open it for needed air ventilation. 


You can also make vents in plastic clear tote containers, clear plastic milk jugs, etc. by poking holes in them. On cold nights, you'll want to cover the holes up with some type of cloth to help retain heat inside.


I also use thermal reflective emergency blankets inside the walls and on the ceiling of my indoor greenhouses. Using these not only helps to reflect light from the grow lights but also adds a layer of insulation to help protect my plants from getting too cold during cold winter nights. The silver foil reflective emergency blankets reduce heat loss, reflect light, and they block out winter drafts. This is a simple, cost, effective way to help keep your plants warm in the winter.


You can also attach bubble wrap to the inside walls and ceiling of your greenhouse to reduce heat loss and to block out cold winter drafts. You can use traditional bubble wrap, or purchase specific horticultural bubble wrap insulation. The bubble wrap that has larger bubbles works the best, and the horticultural bubble wrap does have the larger bubbles. If you don't have a greenhouse, but have a designated greenroom, placing bubble wrap inside your windows will still make a huge difference. 


Another cost effective way to help heat your greenhouse and greenroom is having a compost bucket inside. This method can also help heat the area inside naturally. If you're interested in this method, you'll want to add a layer of coarse sticks at the bottom of your compost container to improve aeration at the bottom. Just be aware that if you do use a compost bucket inside, it can attract rodents.


I have tried a few of the candle methods and I know that many people have claimed that they work, but they weren't that successful for me. Plus, I wasn't too stoked on leaving them alone while burning, nor was it worth it for the length of time that they lasted. So, not only is this method unsafe, I also found that it wasn't that cost effective either. In case you're wondering, I live in zone 7b and it took about sixty candles to heat up a 10x10 area during the last ice storm that we had. Theoretically, the candle method helped when I was in a pinch and lost power, but it isn't feasible to use sixty plus candles every day during the coldest temperatures (I say sixty plus because candles only last x number of hours).


To conclude, I have covered several ways to help add warmth to your greenhouse and greenroom, but it's also key to remember that your plants need to have good air circulation as well, to keep them from overheating and getting diseases. You can do this simply by using fans to help control the humidity.


© 2024 Olden Oasis

oldenoasis.blogspot.com


Saturday, December 21, 2024

Holiday Dog Treats

Holiday Dog Treats

These homemade holiday dog treats are a delightful and healthy snack for your beloved fur baby. The combination of peanut butter, oatmeal, and pre-cooked sweet potatoes, pumpkin, or butternut squash provides a tasty and nutritious treat that your dog will surely enjoy.

Ingredients:

  • 1/2 cup of peanut butter

  • 1 1/4 cup of flour

  • 1/2 cup of pre-cooked sweet potatoes, pumpkin, or butternut squash

  • 1/4 cup of oatmeal

Instructions:

In a mixing bowl, combine 1/2 cup of peanut butter, 1 1/4 cups of flour, 1/2 cup of pre-cooked sweet potatoes, pumpkin, or butternut squash, and a 1/4 cup of oatmeal. Mix the ingredients until they are well combined.


Next, shape the mixture into small bite-sized treats or use a holiday cookie cutter to create fun shapes that will surely bring a wag to your furry friend's tail.


Place the treats on greased baking trays. Now, it's time to bake these delectable treats. Pop them into a 400 degree oven and let them bake for 12 to 15 minutes, or until they turn a beautiful golden brown and become firm to the touch.


Allow your holiday dog treats to cool completely before storing them in a glass jar or Ziploc bag.


© 2024 Olden Oasis

oldenoasis.blogspot.com


Introduction to Holiday Flock Blocks Made With Applesauce

Holiday Flock Blocks Made With Applesauce

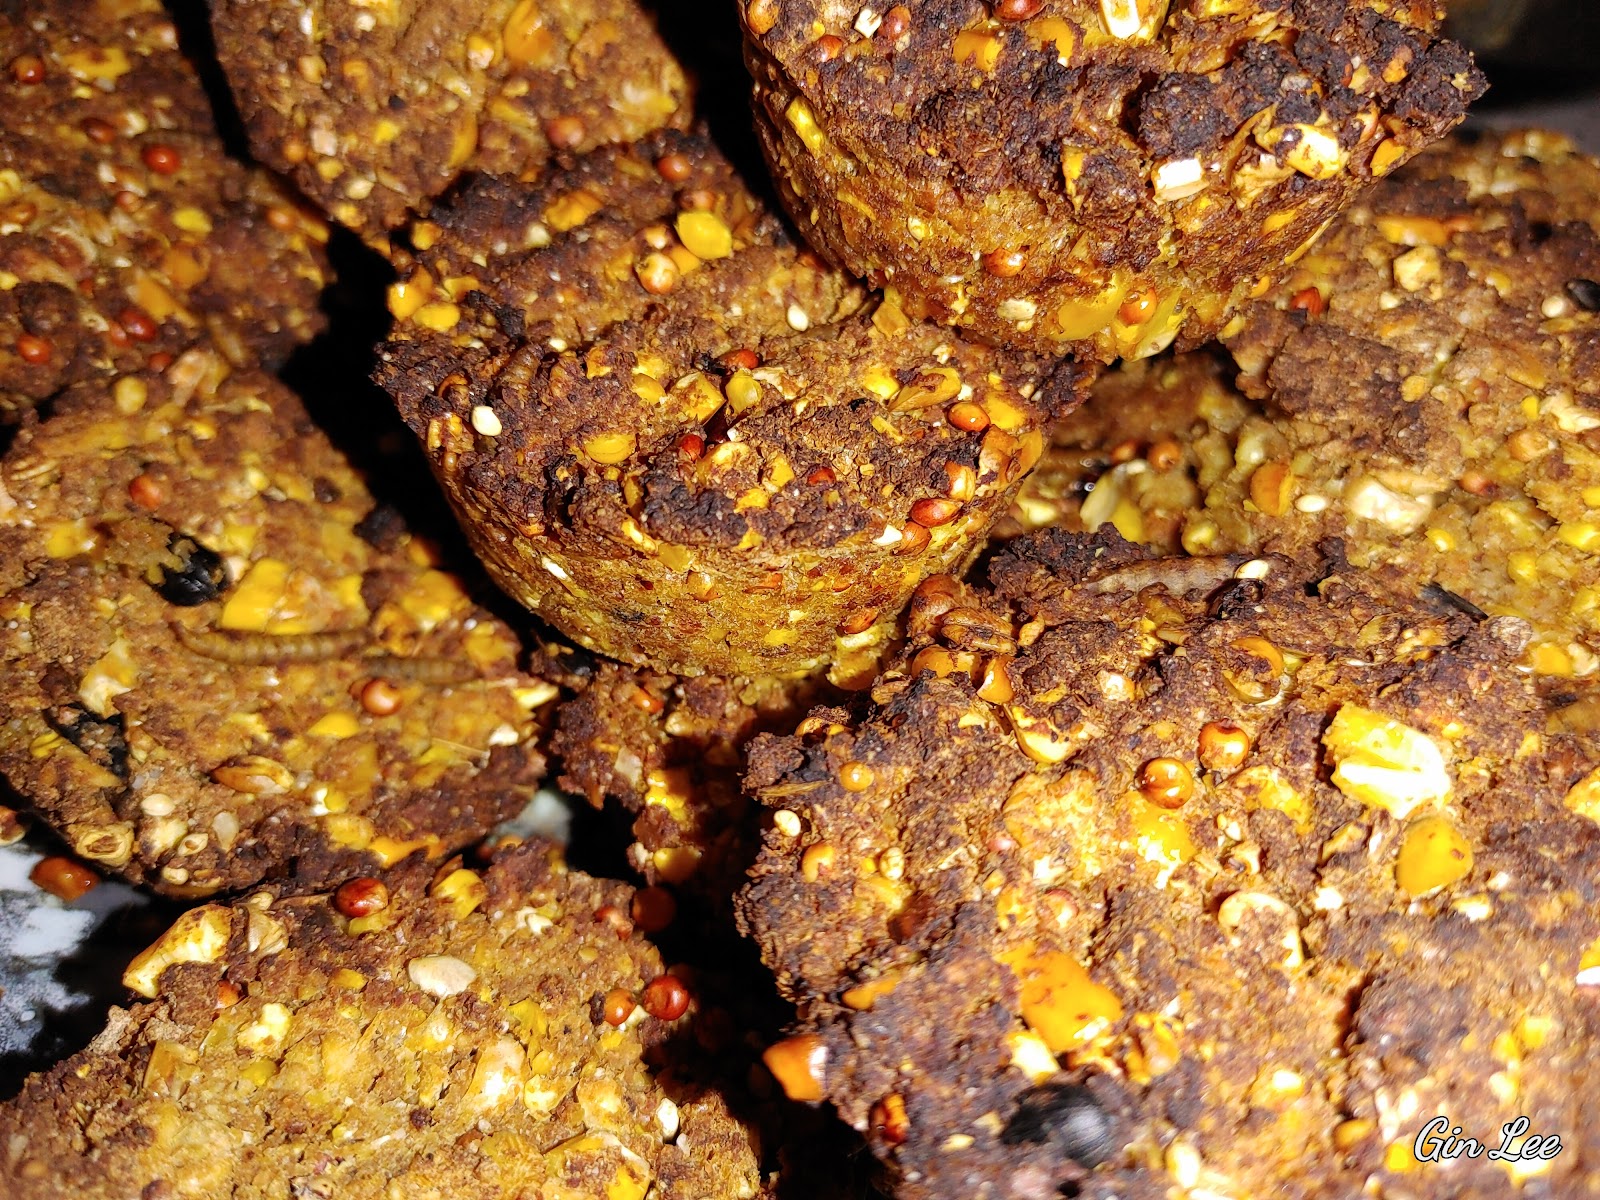
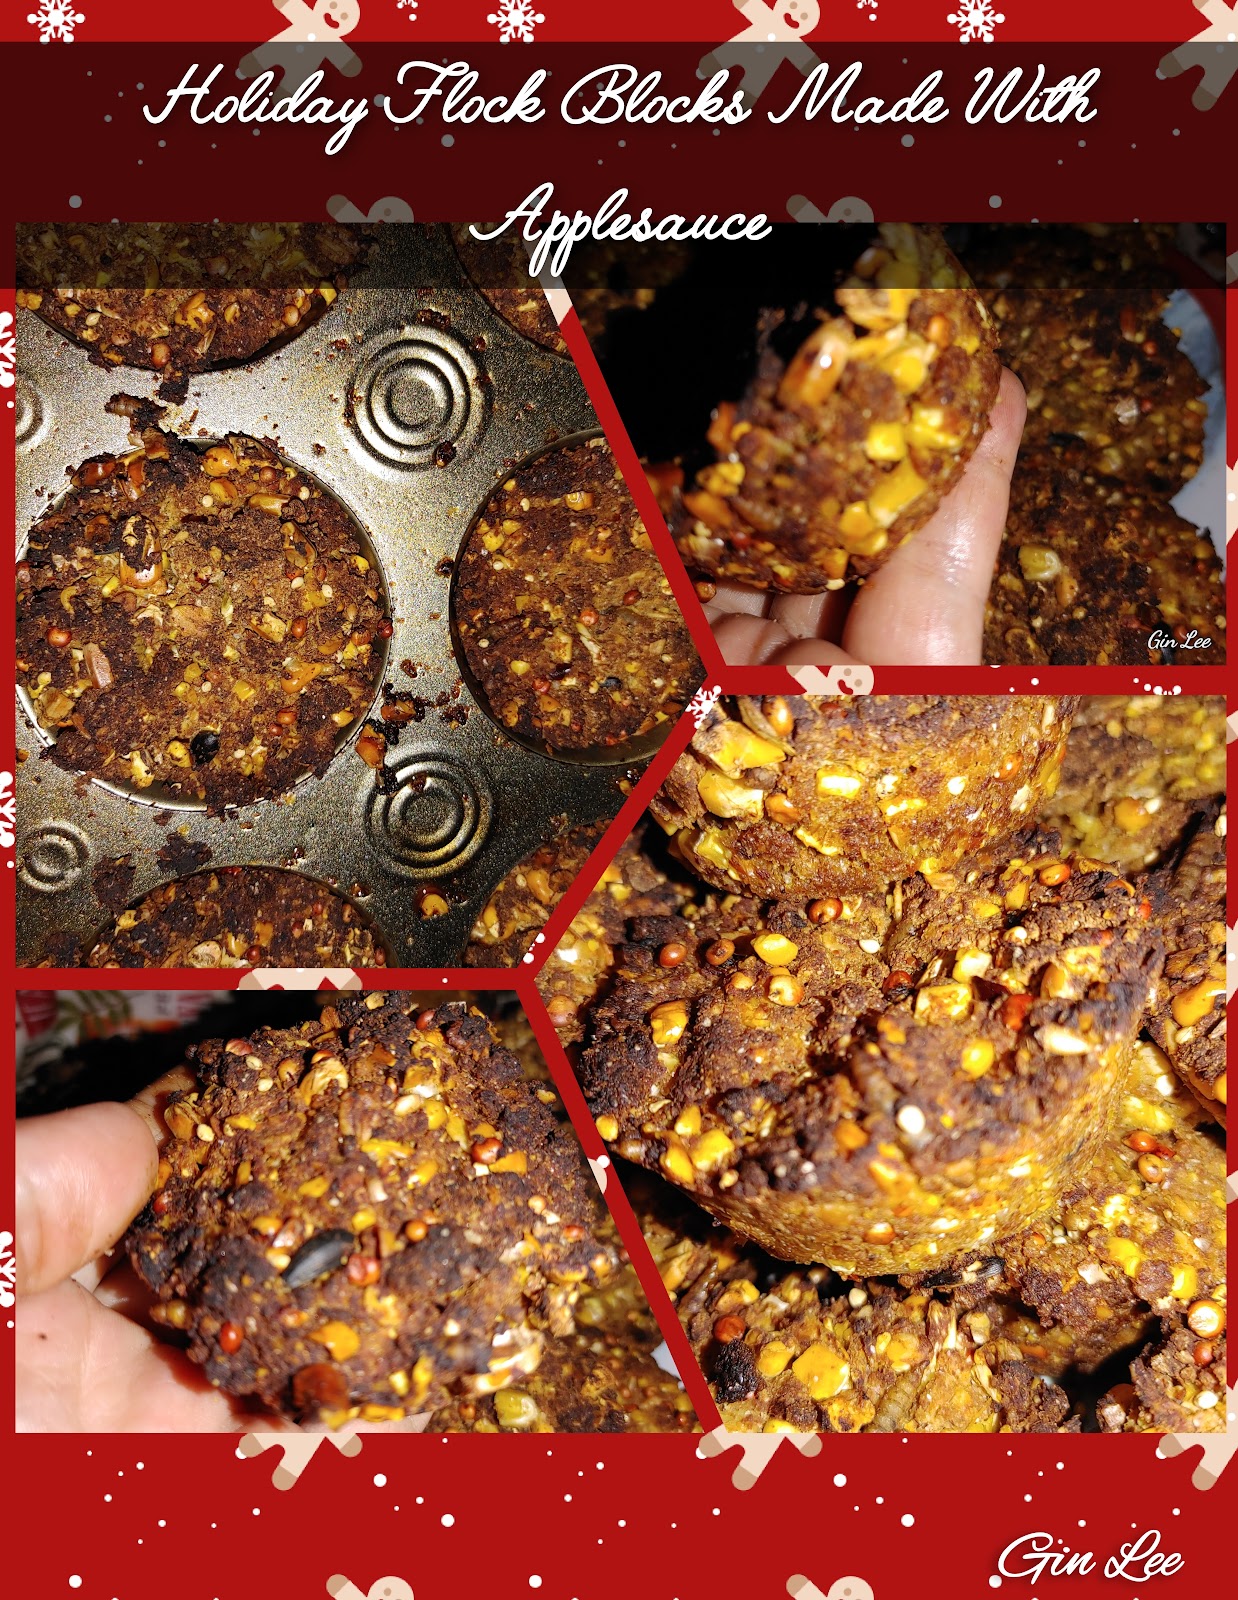
Welcome to my guide on creating delicious and nutritious Holiday Flock Blocks made with applesauce! Designed to provide your flock with a festive and healthy treat, these homemade blocks are packed with the goodness of applesauce and can be customized with various flavors and ingredients. In this article, we will explore the benefits of using applesauce in flock blocks, provide a step-by-step guide on how to make them, suggest creative variations and flavor combinations, offer tips on storing and presenting the blocks, discuss the health benefits for your flock, address common questions and troubleshooting, and conclude with our final thoughts. Let's dive in and create some delightful treats for your feathered friends this holiday season!
Introduction to Holiday Flock Blocks Made With Applesauce

What are Holiday Flock Blocks?

Holiday flock blocks are a fun and nutritious treat for your feathered friends during the festive season. These handy blocks are packed with essential nutrients and can be easily made using simple ingredients found in your kitchen. Not only do they provide a tasty snack, but they also keep your flock entertained and stimulated.

The Advantages of Using Applesauce in Flock Blocks

When it comes to making flock blocks, applesauce is a game-changer. Not only does it serve as a binding agent, but it also offers a range of advantages. Applesauce adds moisture to the mixture, making it easier to mold into blocks. It also enhances the palatability of the treats, making your feathered friends gobble them up in no time. So, get ready to impress your flock with these delightful holiday treats!

Benefits of Using Applesauce in Flock Blocks

Nutritional Benefits of Applesauce for Flocks

Applesauce is not just a tasty ingredient; it also brings a host of nutritional benefits to your flock. It contains essential vitamins, minerals, and antioxidants that promote overall health and well-being. Plus, applesauce is a rich source of dietary fiber, aiding in digestion and preventing digestive issues. By incorporating applesauce into your flock blocks, you're not only giving your feathered friends a delicious treat, but also boosting their nutritional intake.

Enhanced Palatability and Consumption

Let's face it, chickens can be picky eaters at times. But when you add applesauce to the mix, their taste buds go wild! The natural sweetness and aroma of applesauce make it irresistible to chickens, encouraging them to devour the flock blocks with delight. Ensuring that your flock gets proper nutrition and consumes the treats you offer them has never been easier with the help of applesauce.

Step-by-Step Guide to Making Holiday Flock Blocks

Gathering the Ingredients

To get started, you'll need a few simple ingredients:

  • Applesauce (unsweetened)

  • Rolled oats or cornmeal

  • Poultry feed or flock raiser pellets

  • Optional add-ins like dried fruits or herbs

Preparing the Applesauce Mixture

In a mixing bowl, combine the applesauce, rolled oats or cornmeal, and poultry feed or flock raiser pellets. Mix everything together until you achieve a firm, dough-like consistency. If the mixture feels too dry, you can add a little more applesauce to bind it together.

Molding and Setting the Flock Blocks

Once your mixture is ready, it's time to shape the flock blocks. You can use your hands or a cookie cutter to mold them into fun shapes or simply press them into a baking dish for a more traditional block shape. Allow the blocks to set and firm up for a few hours or overnight. Once they're solid, they're ready to be served to your eager flock!

Creative Variations and Flavor Combinations

Adding Dried Fruits and Nuts

Want to take your flock blocks to the next level? Try adding dried fruits like cranberries or raisins, as well as some chopped nuts such as almonds or walnuts to the mixture. These extra flavors and textures will give your chickens a delightful surprise and make their taste buds sing!


Incorporating Herbs and Spices

To add some aromatic goodness to your flock blocks, consider incorporating herbs and spices. Sprinkle in some dried herbs like parsley or basil, or even a pinch of cinnamon or ginger for a touch of warmth. Not only will your flock love the added flavors, but these herbs and spices also offer additional health benefits.


Exploring Savory Options

Who says flock blocks have to be sweet? Experiment with savory variations by adding ingredients like chopped cooked vegetables, cooked quinoa, or even grated cheese to the mixture. Your chickens will appreciate the unique flavors, and you'll have a recipe that stands out from the crowd.


So, get creative and let your imagination run wild as you create these delightful holiday flock blocks made with applesauce. Your feathered friends will be forever grateful for the tasty treats you provide them this holiday season!

Tips for Storing and Presenting Holiday Flock Blocks

Proper Storage Techniques

Once you've whipped up a batch of delicious holiday flock blocks made with applesauce, you'll want to ensure they stay fresh for your feathered friends. To store them properly, simply place the blocks in an airtight container or resealable bag. This will help maintain their moisture and prevent them from drying out. Store them in a cool, dry place, away from direct sunlight and extreme temperatures.

Decorative Presentation Ideas

Who says flock blocks can't be festive? Elevate your presentation by adding a touch of holiday cheer to your feathered feasts. You can place the blocks on a bed of colorful bird-safe edible decorations like cranberries, dried herbs, or even small twigs for a woodland vibe. For an extra wow factor, use holiday-themed cookie cutters to shape the blocks into fun shapes like stars or snowflakes. Remember, your feathered friends deserve a little holiday magic too!

Health Benefits for Flocks and How to Introduce the Blocks

Improved Nutrition and Digestion

Feeding your flock holiday flock blocks made with applesauce not only satisfies their taste buds but also provides nutritional benefits. The applesauce adds natural fruit flavors while offering vitamins and minerals that support their overall health. Additionally, the blocks can aid in digestion due to the fibrous ingredients like oats and seeds, helping to keep their digestive system in check during the holiday indulgence.

Gradual Introduction and Monitoring

Introducing new treats to your flock requires a gradual approach. Start by offering small pieces of the flock blocks and observe how your feathered friends respond. Monitor their consumption and ensure they don't overindulge. Remember, moderation is key when it comes to introducing new foods. If your flock shows any signs of discomfort or abnormal behavior, it's best to consult a poultry expert to ensure their well-being.

Conclusion and Final Thoughts on Holiday Flock Blocks Made With Applesauce

In conclusion, holiday flock blocks made with applesauce are a delightful treat for your feathered friends during the festive season. These blocks not only provide a burst of flavor but also offer nutritional benefits and aid in digestion. By following proper storage techniques and adding a decorative touch, you can elevate the presentation of these treats. Remember to introduce them gradually and monitor your flock's response to ensure their well-being. If you encounter any issues, don't worry—substituting ingredients and adjusting the recipe can help troubleshoot. So, spread the holiday joy to your flock and watch them peck away at these delicious and nutritious treats! Happy holidays, happy flock!

Frequently Asked Questions and Troubleshooting

Can I substitute applesauce with another ingredient?

Yes, if you don't have applesauce or if your flock has specific dietary restrictions, you can consider using other pureed fruits such as bananas or pureed vegetables like pumpkin or sweet potato. Just ensure that the substitute ingredient is safe and suitable for your flock's consumption.

Why are my flock blocks not setting properly?

If your flock blocks are not set properly, there could be a few reasons for this. Firstly, make sure you've followed the recipe correctly and measured the ingredients accurately. Additionally, the ambient temperature and humidity in your surroundings can affect the setting time. If the blocks are not setting, try placing them in a cooler area or refrigerating them for a longer duration.

How long can I store the holiday flock blocks?

The storage duration of holiday flock blocks depends on the ingredients used and the storage conditions. Generally, these blocks can be stored for about 1-2 weeks in an airtight container in a cool, dry place. However, it is always recommended to check for any signs of spoilage or mold before feeding them to your flock.

Can I feed these flock blocks to other poultry animals?

While the holiday flock blocks are primarily designed for chickens, they can also be enjoyed by other poultry animals such as ducks or turkeys. However, it's important to note that some ingredients or flavors may not be suitable for certain poultry species, so always do thorough research and consult with a veterinarian if you have any concerns.


© 2024 Olden Oasis

oldenoasis.blogspot.com


Friday, December 20, 2024

Easy Holiday Cat Treats

Easy Holiday Cat Treats

The holiday season is a time of joy and indulgence, and why should our feline friends be left out? In this article, I'll show you how to make easy homemade cat treats that will have your furry companion purring with delight. Whether you want to spoil your cat with a special holiday treat or simply enjoy the satisfaction of making something from scratch, these recipes are the perfect way to spread some cheer for your beloved pet.

Choosing Cat-Friendly Ingredients

Not all human foods are safe for cats, so it's important to know which ingredients are suitable for our furry companions. Stick to cat-friendly options like lean meats (chicken, turkey, and fish), vegetables (pumpkin, sweet potatoes), and fruits (berries, bananas) that are safe and delicious for your feline friend.

Simple Homemade Treat Recipes for the Holidays

Now, let's dive into some easy and delightful homemade cat treat recipes that will have your kitty begging for more:

Turkey and Sweet Potato Bites

These delectable bites are the perfect way to use leftover holiday turkey. Simply mix finely shredded cooked turkey with mashed sweet potatoes, form small balls, and bake until golden brown. Your cat will think they've hit the jackpot!

Tuna and Cranberry Delights

Combine canned tuna (in water) with a small amount of dried cranberries and a touch of olive oil. Shape the mixture into tiny fish-shaped treats and let your furry friend enjoy the flavors of the sea with a festive twist!

Salmon and Catnip Cookies

Mix canned salmon with a sprinkle of catnip and flour to create a dough. Roll out the dough and shape it into little cookies, or cut it into cute little shapes using cookie cutters. Bake until crispy, and watch your cat go crazy for these irresistible treats!

Festive Ideas for Holiday Cat Treats

You can also get creative with cute cookie cutters to shape the treats into holiday-themed designs. Remember, the presentation is not just for us humans; it can make the treats even more exciting for our furry companions.

Storing the Cat Treats

After making the treats, allow them to cool completely before storing them in an airtight container. Place the container in a cool, dry area. While homemade treats don't usually contain preservatives, they can still spoil if not stored properly. Regularly check for any signs of spoilage, such as mold or an off smell, and discard any treats that appear questionable.


© 2024 Olden Oasis

oldenoasis.blogspot.com


How to Thrive During Tough Times on the Homestead

How to Thrive During Tough Times on the Homestead Hey there, homesteaders! Times can get tough, but with a little bit of creativity and hard...